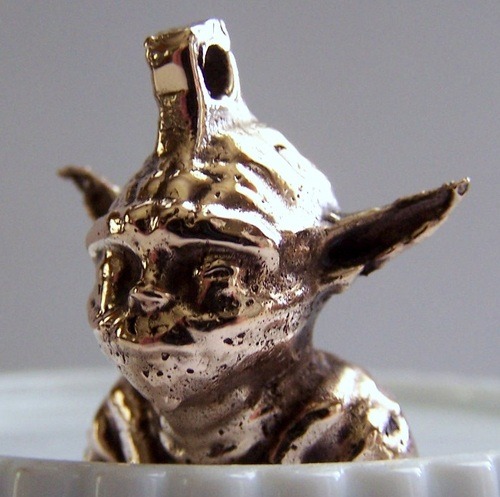
 As promised earlier this week, I am going to start posting the results of our 3D print-to-metal process. We decided to start with a nice iconic 3D printing model, scaled down with an added loop for a keychain or necklace.. Yoda! I believe the original thingiverse yoda model is here: Yoda (bmoshe) / CC BY-SA 3.0 Numerous very creative remixes are posted. We based ours off of the following. Yoda - Lite - more face less robe and a bit bigger (RichRap) / CC BY-SA 3.0
Of course, we had to post our remixed file for free download access as well : ) Yet Another Yoda - Keychain/Charm for Casting (Printed_Solid) / CC BY-SA 3.0
Here is a description of how this charm was made:
Find the 3D model on thingiverse.com and download
Add a keychain loop. How to do this when the file is an stl? We chose a quick and easy method. The file was imported into meshmixer, which contains a library of objects that can be easily added to an existing model.

The file was then exported and opened in ReplicatorG (sailfish) and sliced at 100 micron layer thickness to generate code for the 3D printer.
The part was then printed in ABS plastic on a Makerbot Replicator. We wanted to try ABS so that we could vapor polish the part for casting. At such a small scale, the ears were actually too thin for the slicer to deal with, so there are some gaps. These were filled with wax after casting.
 We printed about a dozen. Around half were vapor polished, and half were left as-printed.
Next, we prepare for investment casting. Rather than walking through all of the steps, here is the video.
Once the casting was complete, the parts were cleaned with a wire brush and soaked in acid to remove scale. The parts were then polished to make them pretty. Here are a few more pics.
The shiny one was vapor polished and the matte finish part was ‘as-printed.’


 One last pic to capture the scale (that’s a penny sitting in front)
  We’re planning on offering investment casting from 3D printed parts as a service. If you have something you would like made, send us a message and we can talk through the details. We’re excited to see what kinds of parts people are looking to make. Update: We’ve realized that we’re not quite sure what to do with a bunch of little yoda heads, so we posted them in our Etsy store.
 PRUSA RESEARCH ACQUIRES PRINTED SOLID INC. TO BE THEIR EXCLUSIVE RESELLER AND SERVICE CENTER IN THE USA