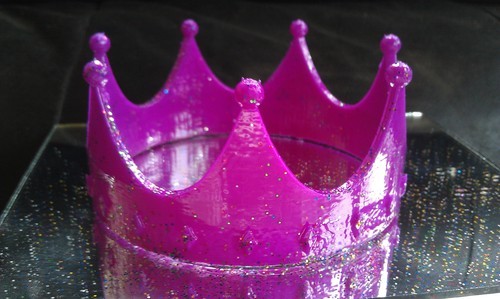
I’ve been pretty busy working on customers’ proprietary projects over the past weeks and haven’t really been able to post about anything I’ve printed. So, I’m doing a writeup on a silly little technique I came up with for things that I make for my daughter. She wanted a princess crown. with sparkles (of course). I browsed around on thingiverse and found a crown that looked like it might be suitable. I found one I liked
here. Then I found an idea for adding glitter to the printed object
here. The glitter polishing idea, by RichRap (who has an amazing blog
here, you’re missing out if you’re into 3D printing and haven’t read it) looked intriguing, but could only easily be used across a few layers of the print. (important note. Simply using the conventional method of white school glue and sparkles would be too straight forward and easy, so that was not an option.)
Then I thought about vapor polishing and how the surface of the model is pretty much a viscous fluid for about 30 seconds after treatment… Crown was printed in purple ABS and tossed into the vapor polisher. Once it was polished, I removed the lid and shook sparkles all over the part. After the part dried, the sparkles were nicely embedded into the ABS and most were covered over with a thin clear coating of ABS. The princess loved it and renamed my vapor polishing setup, “The Sparkleator”. 
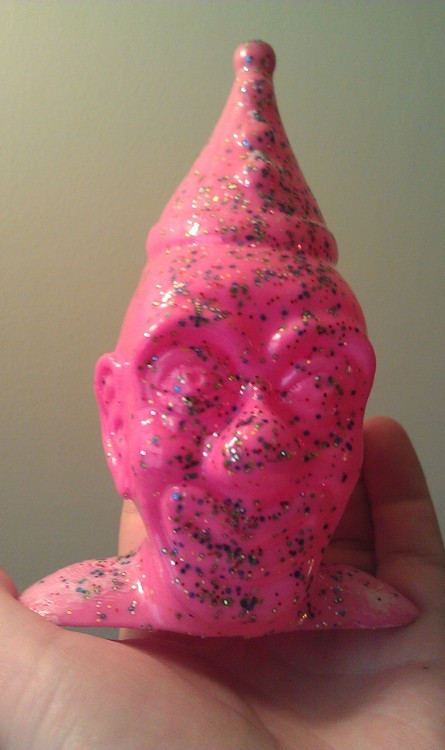
She also wanted a smily sparkly version of our
scary clowns (see link for attribution and file source). Cerberus333 was nice enough to accommodate the request and we made this.
 As I have time to play around with this method, I plan on listing instructions and ideas on thngiverse here. If anyone reads this and tries it out, I’d love to hear about what you made!
 I’ve been pretty busy working on customers’ proprietary projects over the past weeks and haven’t really been able to post about anything I’ve printed. So, I’m doing a writeup on a silly little technique I came up with for things that I make for my daughter. She wanted a princess crown. with sparkles (of course). I browsed around on thingiverse and found a crown that looked like it might be suitable. I found one I liked here. Then I found an idea for adding glitter to the printed object here. The glitter polishing idea, by RichRap (who has an amazing blog here, you’re missing out if you’re into 3D printing and haven’t read it) looked intriguing, but could only easily be used across a few layers of the print. (important note. Simply using the conventional method of white school glue and sparkles would be too straight forward and easy, so that was not an option.) Then I thought about vapor polishing and how the surface of the model is pretty much a viscous fluid for about 30 seconds after treatment… Crown was printed in purple ABS and tossed into the vapor polisher. Once it was polished, I removed the lid and shook sparkles all over the part. After the part dried, the sparkles were nicely embedded into the ABS and most were covered over with a thin clear coating of ABS. The princess loved it and renamed my vapor polishing setup, “The Sparkleator”.
  She also wanted a smily sparkly version of our scary clowns (see link for attribution and file source). Cerberus333 was nice enough to accommodate the request and we made this.
  As I have time to play around with this method, I plan on listing instructions and ideas on thngiverse here. If anyone reads this and tries it out, I’d love to hear about what you made!
 PRUSA RESEARCH ACQUIRES PRINTED SOLID INC. TO BE THEIR EXCLUSIVE RESELLER AND SERVICE CENTER IN THE USA