Printed Solid
Next Gen Printed Solid Safety Enclosure Kit Compatible With UM 3/3ex (EOL)
Next Gen Printed Solid Safety Enclosure Kit Compatible With UM 3/3ex (EOL)
Couldn't load pickup availability


With over 11 years developing enclosures for 3D printers, we are excited to launch the next generation of enclosures. We completely reworked everything from the ground up.
New materials, new approach to cooling, new spool holder, new universal design. Better fire protection over previous generation and easily modifiable by the end user.
More Info
This is an enclosure kit for the Ultimaker 3 3D Printer
-

Being first to market with an enclosure for the Ultimaker 3, and having sold thousands around the world, we have received feedback from end users and have integrated them into our new design.
-
With an easy lift off design, you will be able to easily remove the top and work on your printer. The door easily installs by removing two screws and placing the already assmebled door on the printer, followed by replacing the two screws.
-
The 3D printer is not included with the kit


- Reviews
- Questions
- enclosure
- Prints
- panels
- version
- tape
- money
- problem
- Temp
- back
- Ultimaker
Great enclosure
This upgraded version of their UM3 enclosure is fantastic. I love how they utilized the aluminum clad panels to match the design of the Ultimaker; it looks like a factory option! They also have a couple of fan vents in the back, although they are not a standard fan size, they are probably closer to a standard pipe size; but I have a handy 3D printer to make any size adapter I want! :) This has dramatically improved the quality of my prints and eliminated most of my warping issues, too.
Great Quality Enclosure
I had the 1st gen of this product and I really liked it. The new version with the Al cladded boards are awesome. Highly recommend.
Must have for printing high temp & stinky materials like ASA, ABS, PC, Nylon on your Ultimaker 3
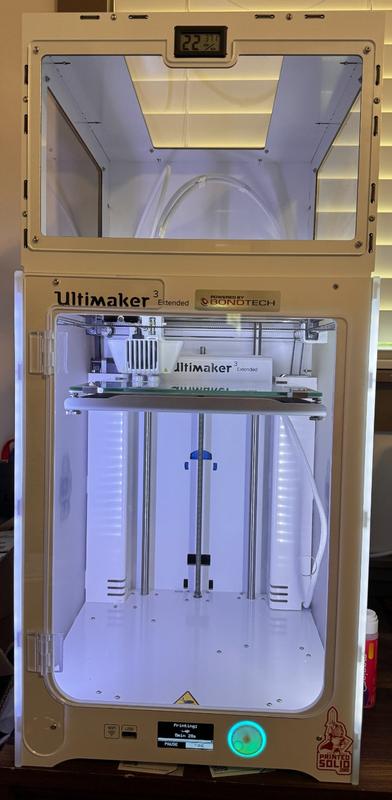
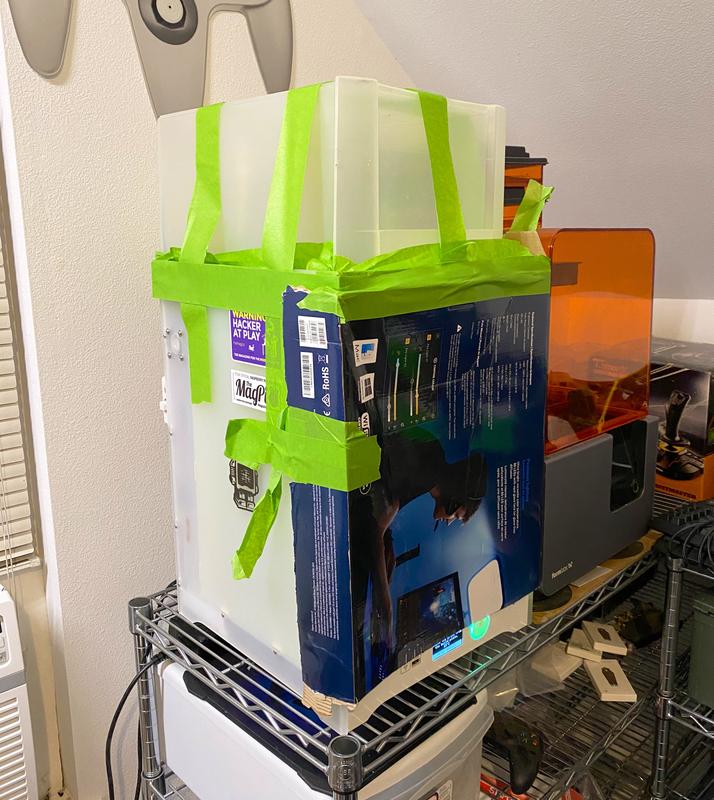
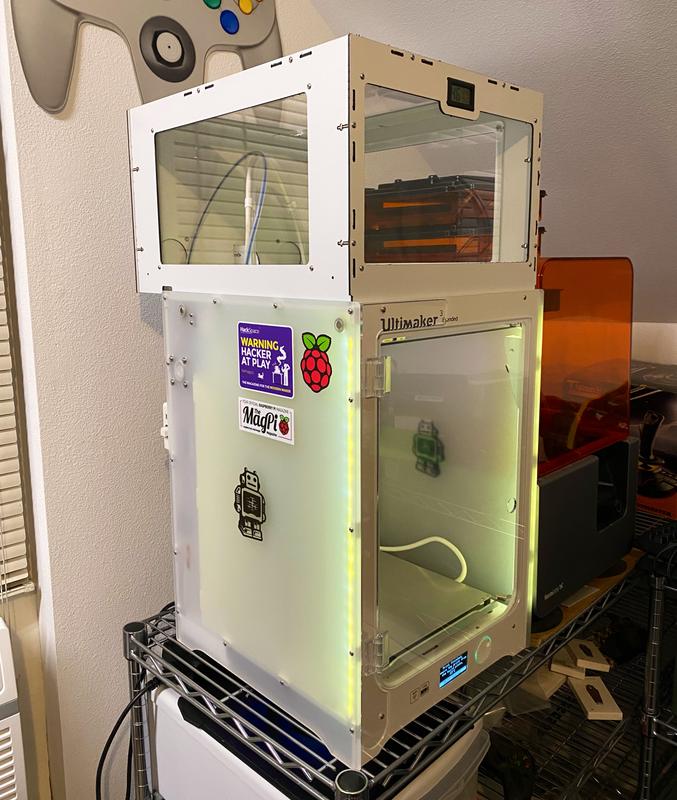
I'm currently in the process of building an LDO Motors Voron 2.4 REV C 3D printer and I need to 3D print all the parts necessary to finish the build and there are a lot of them! All of the parts for this Voron must be printed in ABS or ASA material which my Ultimaker 3 is capable of printing with an AA cartridge and 100C bed temp however without an enclosed build environment the prints will detach from the build plate or curl dramatically making the parts dimensionally inaccurate, so they won't work for final assembly. This is common with printing ABS and ASA in non-tropical environments. If the temp in your room is 120F with no air flow from fans then don't worry about enclosing the printer since you'll probably be fine but here in Washington State the temps fluctuate a lot, and my computer room is temp controlled at 70C with an air conditioner which means that air flow ends up ruining my ABS and ASA prints every time! It was so hard to print ABS and ASA I just gave up on it until this Voron project came up and I had to revisit because it was such a pain the behind. I started by cobbling together a makeshift enclosed chamber using an upside-down plastic drawer and discarded box from my Elgato Key Light taped with frog tape to the printer itself (see picture 1 below) to seal it up and keep the heat and fumes inside as a proof of concept and it actually ended up working like a dream! With this configuration the build environment was getting super-hot where if I opened the door it felt like an oven on reheat wafted out, but I had no idea how hot it was actually getting in there. This also means I saved a lot of money on electricity not having to run the build plate heating the whole room but rather just the small chamber so from this point forward I will be printing with an enclosure for hot materials and without it for PLA and other low temp materials since they prefer that. I printed over 30 parts so far in huge batches without a single curl or deformation using this method but unfortunately it keeps falling apart and I have to keep taping it back together. I also can't see what's going on inside of the printer other than using the crappy camera built into it since I can't see through cardboard and the drawer was frosted. I reached out to Printed Solid on Twitter and asked if they had an enclosure for the Ultimaker 3 since I remember them saying they had an enclosure kit for the Ultimaker 1 and 2 previous years and I never tried it. Sure, enough they had one in stock and sent it to me to help out with my Voron project and it arrived in a flat pack box that I couldn't believe contained this whole thing. Upon emptying the box, I found a stack of composite panels that look to be milled or laser cut along with acrylic panels for the cutouts and the front door for the UM3 extended which is my model. I immediately lost the instructions like an idiot but was able to put this entire thing together in under 20 minutes sitting in bed eating my dinner just by looking at the picture on this website for the product to figure out assembly, it wasn't hard at all even without the directions but once I found the directions I realized that I could have made it even easier on myself had I done things a little differently so defiantly follow the directions. Especially the one where you use a little piece of tape to hold the nuts in place while you put the screws in. That tip alone would have saved me 50% of the time. At first glance the panels looked like they were laser cut plywood but upon closer inspection they are actually aluminum composite where you have 2 aluminum sheets with a filler layer sandwiched between them making the panels super light and super strong! They paint the aluminum white to match the aesthetic of the Ultimaker which I really like, and the finish quality is top notch with protective film on everything you only remove before you start assembly. Also, it's incredibly easy to remove and put back this hood back on the printer which I'm grateful for since I'll still be printing PLA and other low temp plastics in the future on this UM3. The temperature/humidity probe is a really nice touch since it allows you to see the temp inside of the build environment and confirm that it's staying consistent and airflow in the room isn't causing you problems if it changes. I'm going to give this kit 4/5 starts because it solves a huge problem when printing high temp materials while being easy to build, install & remove and I think it looks very cool. Plus if you have kids or cats you really do need an enclosure, so they don't get burned! I'm only taking away one star because the front door just has a hole to open and close it and no latching mechanism so when I turn on the fan in my room it can pop the door open. But, I can simply 3D print a latch that will lock the door to the inside of the frame with about 15 minutes of 3D modeling, so I'm not worried about it. Future kits should have a latching mechanism
- Choosing a selection results in a full page refresh.